Intro
Feed
A collection of short notes, interesting links, and the occasional long form post.
Items
-
- Published
interfaces.dev

-
- Published
www.figma.com

-
- Published
The Risks of Agentic Coding
larsfaye.com

Lars Faye discusses the pitfalls of agentic coding, where reliance on AI for coding tasks may lead to cognitive atrophy and a decline in critical thinking skills among developers. The article highlights the complexities and trade-offs of using AI coding agents, emphasizing the need for hands-on coding experience to maintain skill levels.
coding · ai · skills · development
-
- Published
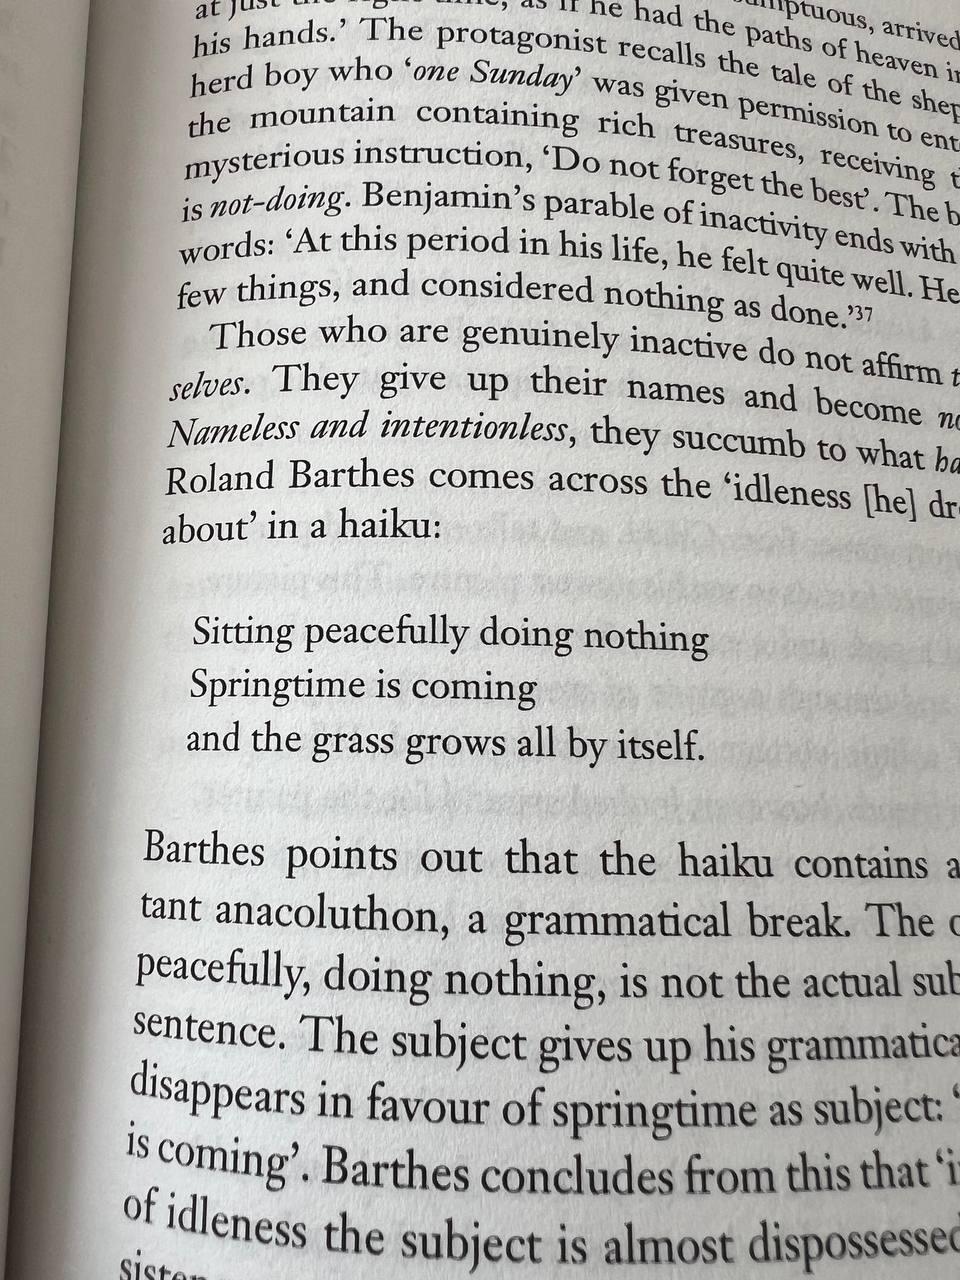
Doing nothing
-
- Published
Inducing Positive Emotions Through Meditation
substack.com

The article explores how individuals can cultivate positive emotions through meditation techniques, specifically focusing on the concept of ‘jhanas.’ It explains how by creating a feedback loop of joy, love, and peace, one can achieve profound emotional states that are empirically measurable, similar to the experience of a panic attack but in a positive context.
meditation · jhana · positive psychology · mental health
-
- Published
Ezra Klein Podcast with Julia Belluz
www.nytimes.com
The article discusses an episode of the Ezra Klein Podcast featuring Julia Belluz, where they explore topics related to health and journalism. The conversation delves into the challenges and responsibilities of reporting on health issues in today’s media landscape.
podcast · opinion · health · journalism
-
- Published
Moby Live Performance at KCRW HQ
www.youtube.com
Moby performed a live set at KCRW’s Annenberg Performance Studio before heading to Coachella 2026. The performance featured tracks from his latest release ‘Future Quiet’ alongside classic hits, showcasing his artistic evolution over the years.
moby · live music · kcrw · performance · 2026
-
- Published
Copy Fail Vulnerability Overview
copy.fail
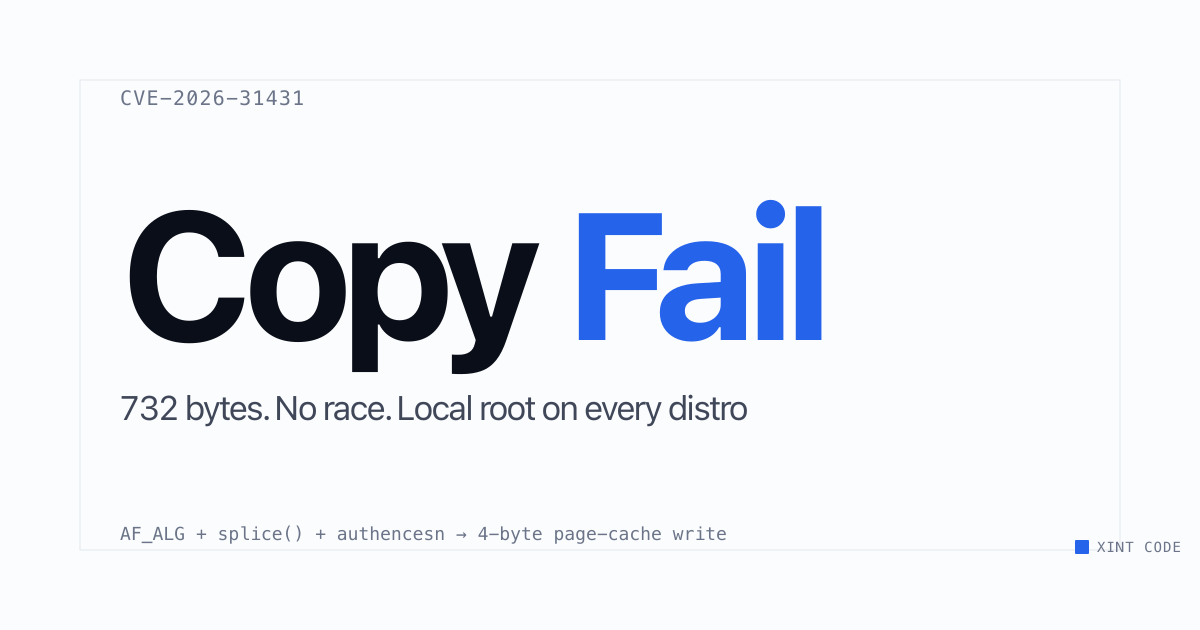
The Copy Fail vulnerability (CVE-2026-31431) allows unprivileged local users to gain root access on any Linux distribution since 2017 using a 732-byte Python script. This exploit leverages a logic flaw in the kernel’s crypto API, enabling a straightforward attack without the need for race conditions or kernel-specific offsets. Affected systems should prioritize patching to mitigate this high-risk security issue.
linux · security · vulnerability · exploit
-
- Published
Andrej Karpathy on Vibe Coding and Engineering
youtu.be
In this talk, Andrej Karpathy discusses the evolution of programming concepts from ‘vibe coding’ to ‘agentic engineering’ and reflects on his feelings of inadequacy as a coder. He emphasizes the importance of understanding large language models (LLMs) as complex entities that require new approaches to programming and judgment. Additionally, he introduces the concept of Software 3.0 and explores the challenges of verifiability in modern software development.
andrej karpathy · vibe coding · agentic engineering · artificial intelligence · software development
-
- Published
Introducing Meta Ads CLI for Developers
developers.facebook.com
Meta has launched the Ads CLI, a command-line interface that allows developers to manage Meta ad campaigns efficiently. This tool simplifies tasks such as creating, editing, and analyzing campaigns without the need for extensive coding, integrating seamlessly into automated workflows.
meta · ads · cli · marketing · api
-
- Published
Managing Coding Agents with Conductor
www.conductor.build

Conductor is a Mac application designed to orchestrate teams of coding agents, allowing users to create parallel Codex and Claude Code agents in isolated workspaces. It provides features for monitoring progress, reviewing changes, and merging code efficiently.
coding · team management · software · mac app
-
- Published
ReasoningBank: Learning from Experience in AI
research.google

ReasoningBank is a platform developed by Google that enables artificial intelligence agents to learn from their experiences. This initiative aims to enhance the capabilities of AI systems by allowing them to improve their reasoning and decision-making processes over time.
artificial intelligence · machine learning · research · google
-
- Published
Curater Feed Highlights
curater.org

The Curater feed showcases a variety of creative works including furniture design, photography, and music. Featured pieces range from iconic industrial designs to contemporary art, highlighting the intersection of aesthetics and functionality. The platform invites users to explore and share inspiration across different artistic mediums.
art · design · photography · architecture · music
-
- Published
Redesigning Engineering Interviews for AI
sierra.ai

Sierra has revamped its engineering interview process to align with the evolving role of software engineers in an AI-driven landscape. The new AI-native interview format emphasizes product thinking and real-world application, allowing candidates to demonstrate their skills in a more representative and engaging manner. This approach focuses on hiring for strengths and understanding candidates’ potential contributions rather than just assessing their technical weaknesses.
engineering · interviews · AI · hiring · product thinking
-
- Published
YouTube Video Access Error
youtu.be
The page indicates that unusual traffic from the user’s network has been detected, resulting in an error 429: Too Many Requests. Users may need to complete a CAPTCHA to verify their identity and gain access.
youtube · error · access · traffic
-
- Published
Introduction to Fluid Dynamics
neuform.ai

The page introduces the topic of fluid dynamics, a branch of physics that studies the behavior of fluids in motion. It is part of Neuform’s educational resources.
fluid dynamics · neuform · science · education
-
- Published
Personal Website of Robin Spielmann
iamrob.in

The website iamrob.in is a personal space for Robin Spielmann, a design engineer who shares his work, interests, and projects. It features sections on books, movies, music, photography, and various projects including generative art and a browser extension. The site aims to provide a platform for creative expression without the constraints of social media.
personal · portfolio · design · art · projects
-
- Published
Alle Farben DJ Set in Bangkok 2026
www.youtube.com
This video features a DJ set by Alle Farben recorded in Bangkok, Thailand in 2026. The set showcases a mix of electronic music and has garnered over 8,000 views since its release.
alle farben · dj set · bangkok · music · live performance
-
- Published
Building a Minimal Coding Agent
mariozechner.at
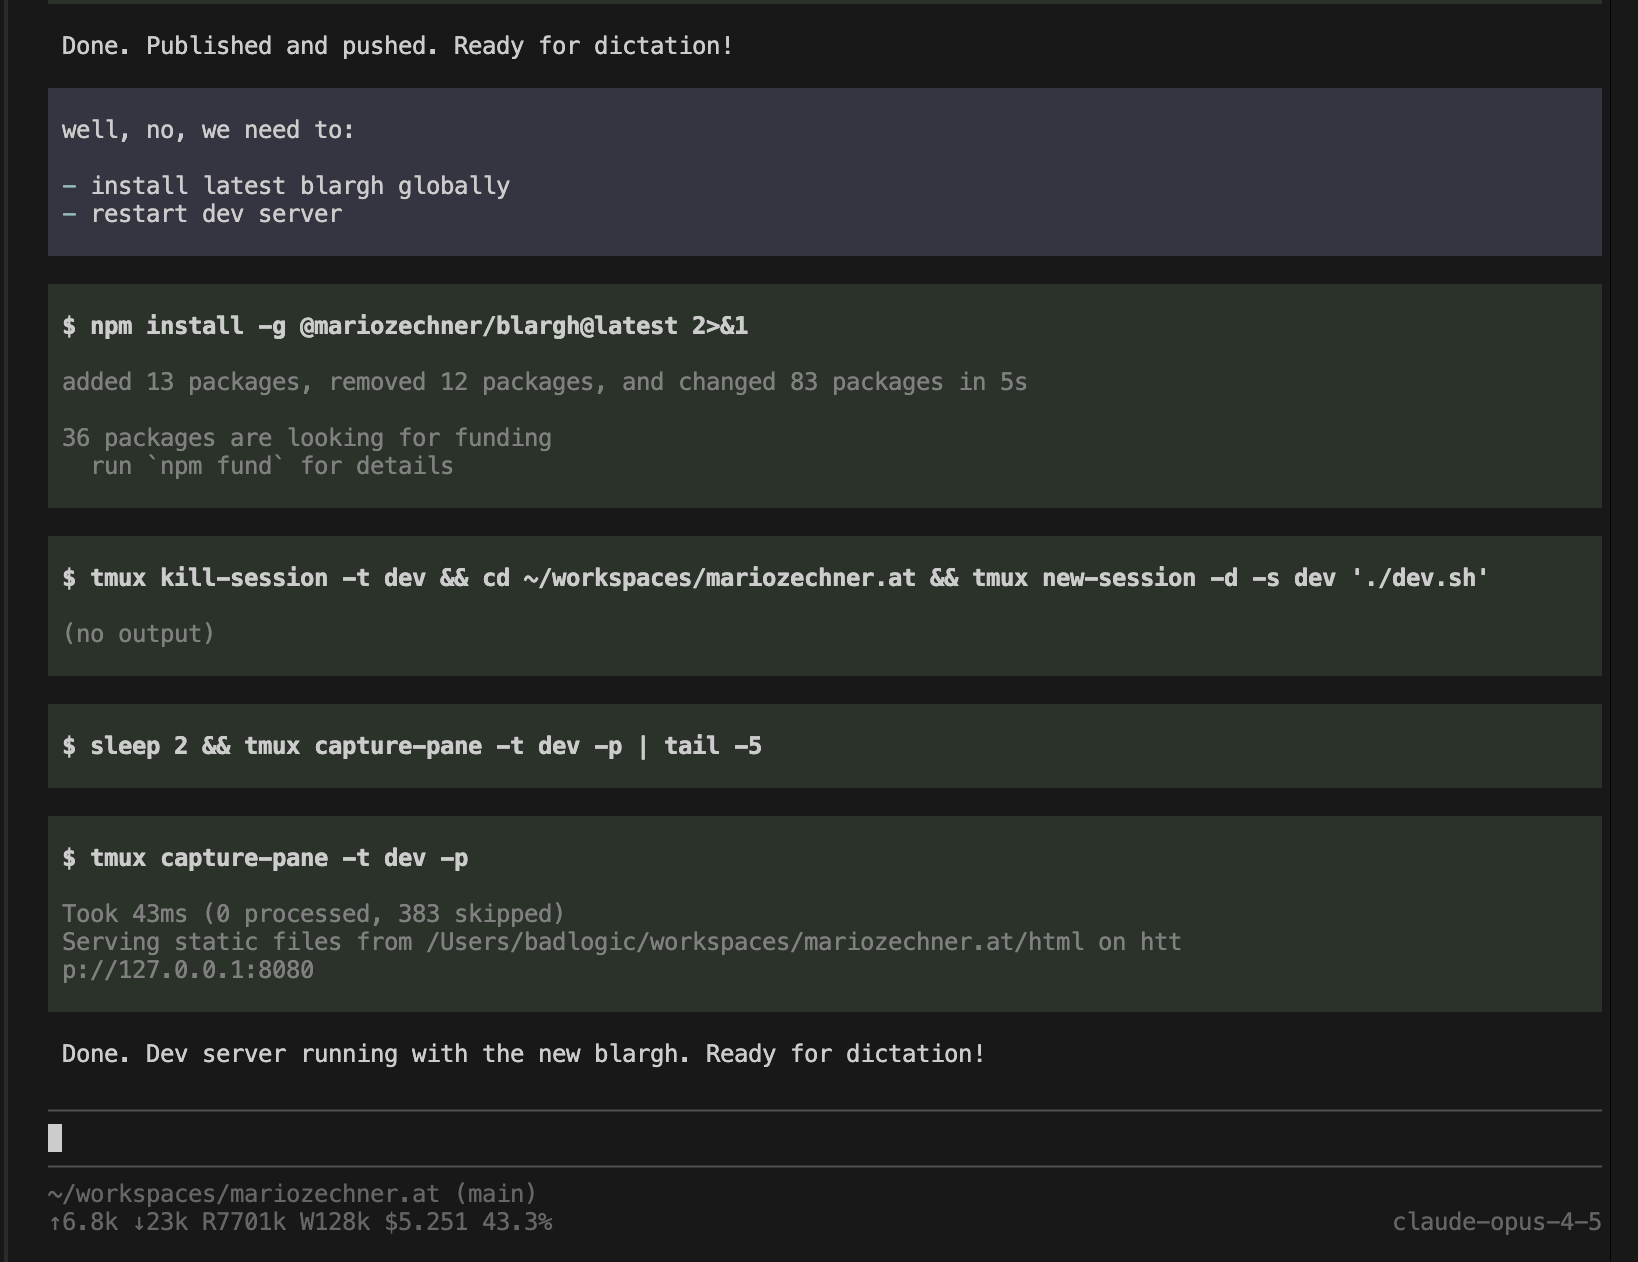
The article discusses the author’s experience in creating a minimal and opinionated coding agent, highlighting the challenges faced with existing tools and the importance of context engineering. It details the development of various components like pi-ai, pi-agent-core, and pi-tui, emphasizing a philosophy of simplicity and necessity in design.
coding · ai · development · software
-
- Published
Orca: Next-Gen IDE for Coding Agents
github.com
Orca is an innovative integrated development environment (IDE) designed for building applications with coding agents. It aims to enhance the coding experience by leveraging artificial intelligence to assist developers in their workflows.
github · ide · coding · ai · software
-
- Published
The Psychology of Lying Explained by Sam Harris
www.youtube.com
In this video, Sam Harris discusses the complexities of lying and its psychological implications. He explores the dangers of dishonesty and the concept of radical honesty, emphasizing the importance of truth in interpersonal relationships.
psychology · lying · sam harris · honesty · truth
-
- Published
Agentfiles: AI Coding Agent Skills Management
github.com
Agentfiles is a GitHub repository designed to help users discover, organize, and edit AI coding agent skills across various platforms such as Claude Code, Cursor, Codex, and Windsurf. It integrates with Obsidian, providing a streamlined way to manage these skills.
ai · coding · github · obsidian · tools
-
- Published
Moby - 'Le Vide' Official Audio Release
youtu.be
The official audio for ‘Le Vide’ by Moby has been released, featuring in his new album ‘Future Quiet’. The video has garnered over 48,000 views since its release on February 19, 2026.
moby · music · audio · futurequiet
-
- Published
SubZeroClaw: A Minimalist Autonomous Agent
github.com
SubZeroClaw is a lightweight C-based autonomous agent designed for edge hardware, executing tasks defined in markdown files without safety checks. It operates by reading skills, calling a language model, and executing shell commands in a continuous loop. The software emphasizes simplicity and efficiency, avoiding complex frameworks and architectures.
github · c · autonomous · agent · llm
-
- Published
MAHORAGA: AI-Powered Trading Agent
github.com
MAHORAGA is an autonomous trading agent that operates 24/7 using social sentiment analysis from platforms like StockTwits and Reddit. It employs various AI models to analyze trading signals and executes trades through Alpaca. The system is designed for educational purposes and allows users to create custom trading strategies.
trading · ai · cryptocurrency · social sentiment · automation
-
- Published
Orbit’s current approach
Fixed growth factor (2.3x), same for every card and every user. No memory model — just mechanical interval multiplication. This is essentially the SM-2 family (1987 vintage).
What’s changed: FSRS
The big development is FSRS (Free Spaced Repetition Scheduler), which landed in Anki in late 2023 and is now mainstream. It’s based on the Three Component Model of Memory:
- Retrievability (R) — probability you can recall right now (decays over time)
- Stability (S) — how many days until R drops to 90% (the “strength” of the memory)
- Difficulty (D) — per-card intrinsic difficulty (affects how fast stability grows)
Key differences from what Orbit does:
┌─────────────────────┬───────────────────────────────────┬──────────────────────────────────────────┐ │ │ Orbit (SM-2 style) │ FSRS │ ├─────────────────────┼───────────────────────────────────┼──────────────────────────────────────────┤ │ Model │ No memory model, fixed multiplier │ DSR memory model │ ├─────────────────────┼───────────────────────────────────┼──────────────────────────────────────────┤ │ Per-card adaptation │ Same growth factor for all cards │ Difficulty tracked per card │ ├─────────────────────┼───────────────────────────────────┼──────────────────────────────────────────┤ │ Per-user adaptation │ None │ Learns from review history │ ├─────────────────────┼───────────────────────────────────┼──────────────────────────────────────────┤ │ Target retention │ Implicit │ Explicit (you pick, e.g. 90%) │ ├─────────────────────┼───────────────────────────────────┼──────────────────────────────────────────┤ │ Efficiency │ Baseline │ ~20-30% fewer reviews for same retention │ └─────────────────────┴───────────────────────────────────┴──────────────────────────────────────────┘
What’s worth considering
- FSRS adoption — it’s open source, implementable in ~100 lines, has a TypeScript implementation, and is trained on 700M+ reviews. The research backing is solid.
- Per-card difficulty — this is the lowest-hanging fruit. Some cards are just harder. Orbit’s flat 2.3x treats “What year did WW2 end?” the same as a dense biochemistry pathway. FSRS adjusts growth per card based on your history with it.
- Target retention rate — FSRS lets users pick their desired retention (default 90%). This is philosophically interesting for Orbit since different contexts want different retention — language vocab vs. conceptual understanding vs. exam prep.
- Content-aware scheduling — newer research and LECTOR (2025) use semantic similarity between cards to adjust scheduling. If you know card A, and card B tests a related concept, B’s interval can be adjusted. This fits nicely with Orbit’s provenance/source grouping.
- Deep RL approaches — DRL-SRS uses a Transformer to model learning trajectories. Interesting but probably overkill for now.
My take
The pragmatic move would be FSRS. It’s the “React of scheduling algorithms” right now — battle-tested, well-documented, open source, already proven at scale. The per-card difficulty tracking alone would be a significant improvement over the flat 2.3x multiplier.
The exotic stuff (content-aware, RL-based) is interesting but adds complexity that might not justify itself yet. Though content-aware scheduling could be a natural fit given you’re already building source/provenance grouping.
What’s your thinking — incremental improvement (add per-card difficulty to the existing scheduler) or go full FSRS?
Sources:
- FSRS GitHub
- Implementing FSRS in 100 Lines
- ABC of FSRS
- FSRS vs SM-2 Guide
- Content-aware Spaced Repetition
- DRL-SRS Paper
- LECTOR Paper
-
- Published
Pencil: Design and Code Integration Tool
www.pencil.dev

Pencil is a design tool that integrates directly into your codebase, allowing for seamless design and coding without handoffs. It features an infinite design canvas, pixel-perfect precision, and supports curated design kits, making it easy to create production-ready applications. Additionally, it allows for importing designs from Figma and offers a fully open file format for flexibility.
design · coding · software · development
-
Latest Updates on X Platform
social media · updates · news
-
- Published
Understanding Page Views on Wikimedia Projects
meta.wikimedia.org
This document outlines the definition and significance of page views as a key content consumption metric for Wikimedia projects. It details the criteria for what constitutes a page view, the sources of page view data, and the methods of extracting and analyzing this data.
wikimedia · page views · data analysis · metrics
-
- Published
Understanding Spaced Repetition for Learning
gwern.net

Spaced repetition is a psychological technique that enhances memorization by spacing out review sessions over time, rather than cramming. This method is particularly effective for learning large amounts of information, such as foreign languages and medical studies, and is supported by research on memory retention. The article reviews its applications, available software tools, and the underlying cognitive psychology principles.
spaced repetition · learning · memory · study techniques